

Well my friends, I always start the new version special explaining how to install. What makes it no less important to explain step by step.
As always, for writing this tutorial NOT USE THE FINAL VERSION for reasons of time. I used the Beta version released in September. as in many steps, things have not changed.
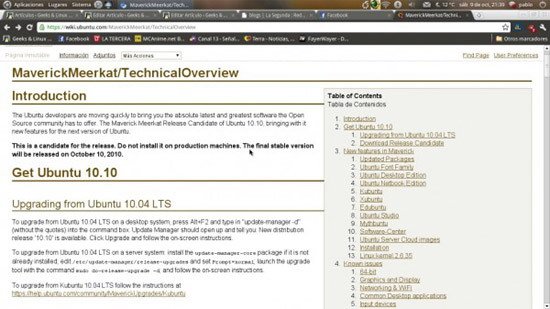
If you want to see the innovations that bring Ubuntu 10.10, can check this post ... In general, there are great news indeed, but is a step forward and appreciated.
As always, for writing this tutorial NOT USE THE FINAL VERSION for reasons of time. I used the Beta version released in September. as in many steps, things have not changed.
If you want to see the innovations that bring Ubuntu 10.10, can check this post ... In general, there are great news indeed, but is a step forward and appreciated.
First: Download Ubuntu
To download go to the Ubuntu download page:
Now you can download the latest version, which is also LTS. For those not familiar with Ubuntu, the difference between the last version and the LTS (long time support) are the months in which maintenance is performed. The Long Time Support is for 36 months, and which are not maintained it for 18 months.
After choosing the latest version, look for a place near where you live to download the image. Click Begin Download, and start downloading. After downloading the image, burn it onto a CD or a flash drive (this version is for users who already have Ubuntu: System/Admin/Boot Disk Creator) and are ready to install.
After choosing the latest version, look for a place near where you live to download the image. Click Begin Download, and start downloading. After downloading the image, burn it onto a CD or a flash drive (this version is for users who already have Ubuntu: System/Admin/Boot Disk Creator) and are ready to install.
Install Ubuntu 10.10
Put the CD or flash drive in your computer and restart. set it to boot from the CD or Flash Drive. After a moment to load, it will open the installer:

The first thing I ask is that if you want to try Ubuntu without installing it or install it directly. If you want to modify a previous version installed, choose the second option in order to access your partitions.
After selecting the option, it will start, now, the installation wizard:
After selecting the option, it will start, now, the installation wizard:

After selecting both the language and keyboard, will show you what you need to install Ubuntu:

Now, we proceed to partition the disk:

This stage is what one might call the more "complicated." And it is in quotes because if you read carefully what you said, you have no problems. However, there are more advanced options that require time and patience to master.
To install Ubuntu, we have 3 options:
To install Ubuntu, we have 3 options:
Ubuntu and other operating system
For this option, choose Install next to the other, choosing between them at every boot. If you do it this way, each time you start your computer you will see a black screen that lets you choose which system you want to upload. Among them, the alternative system.
Only Ubuntu
If you want to just install Ubuntu, choose the second option. Ubuntu install from scratch, but not split your drive (hey, this is important. Later I will explain why)
Partitioning "A hand"
If you choose this option, you can edit your partitions, select the file system that best fits your needs, and give the size you want your partitions. In addition, there is something important you can do: you can separate your system partition of your documents. This allows you to reinstall Ubuntu from 0 without having to remove your documents.
SUPPORTS YOUR DOCUMENTS BEFORE YOU DO THIS IF YOU ARE A NOVICE. AN ERROR MAY DELETE YOUR DOCUMENTS, AND TO THAT NOTHING CAN BE DONE. IF YOU ARE ADVANCED, YOU KNOW THAT THE RISK TO PASS SOMETHING is very low, BUT ALWAYS IS. ALSO DO SO.
Creating my partitions
To create partitions, you have supported all your documents, because this involves clear your system. Except you've done it before and want to keep your home.
I recommend that if you are installing only Ubuntu, divide it into 3 partitions:
I recommend that if you are installing only Ubuntu, divide it into 3 partitions:
- The first will be the system partition, or /. Its size is at least 3 gigabytes. Why? 2 gigs are needed to install the base system, and leave a bit to install programs. But if you're going to use only Ubuntu, I recommend that you put at least 7 gigabytes.
- The second is the partition where are your documents, or /home. This size you put it, and depends solely on how much you're using Ubuntu.
- The third is the partition swap. This partition must be yes or yes. To know how much space we give you, the Ubuntu Guide recommends the following rule:
- For partitions 1 gig or less, the swap should be twice your RAM. So, if you have 512 megs of RAM, your swap should be 1 gig.
- For partitions of 2 GB or more, the swap will be half of your ram (Editor's Note: This is a bit outdated, if you have more than 2 GB, leave only one)
If we do as I said, it should be something like this:

To create a new partition, select the new partition table:

- First, choose the type of new partition: Primary or Logical.
Primary partition allows the system load. Logical partitions are used to having multiple partitions, for example, have separate documents partition.
- Then choose the size you want for your partition. Remember what I said earlier.
- Then choose the location of the partition. For the system (/) elected at the beginning, and to choose the final swap (/)
- How we choose to use the file system you wish to use. For version 9.10 version includes ext4 by default. and I recommend them 100%. . Those who use Ubuntu for a while we noticed the difference. Sides view the files in the Linux partition in Windows do not choose this option in the partition of your file (/home), and there are no programs for the moment that you can detect, better choose ext3.
- Here we can also choose the mode swap (swap partition). When you do not go below anything else. Do not worry, and click on OK.
Now we have to choose the mount point. Follow the instructions below:
- For the system partition, select /. When you leave, select the Format option

- For the partition of your documents, choose /home. If you are updating your Ubuntu partition and previously had a home, when you leave the format option is deselected. In this way, you can collect your documents and settings and desktop programs.
- If you have a Windows partition, will appear as NTFS. You can edit your free space to give to Ubuntu. However, I recommend that you back up your files. You never know ...

If you did not like what you did, you can click Undo changes to partitions, and everything is back to normal. If you're ready, click Next.
Now, while installing, you can configure the system which is great because you can save much time. And if you install via USB stick, you take much less. Start by setting the time zone:
Now, while installing, you can configure the system which is great because you can save much time. And if you install via USB stick, you take much less. Start by setting the time zone:

We then went to configure your keyboard:

Click Forward. Here we put our personal data, the password you will use (and also will be the default for our system permissions, so do not forget) and our name on the network.

After that, it will make a tour of what Ubuntu is and the advantages that account to install it:

After a while, Installed System! When finished, you will have to restart the system:

Well gentlemen, after these steps, and restart, we will have installed Ubuntu.
Well, with that special finished the new version. Tutorial installation and configuration, all in 1 day. Later discuss the details of this version on computers
That. Greetings. And enjoy Ubuntu!
Well, with that special finished the new version. Tutorial installation and configuration, all in 1 day. Later discuss the details of this version on computers
That. Greetings. And enjoy Ubuntu!


 STEP BY STEP With Pictures)
1 Comments
How to install a anti virus program an Ubutu 10.10
ReplyDelete